 MIRTO (the MIddlesex Robotic plaTfOrm, also known as Myrtle) is an Arduino+Raspberry Pi platform currently used for teaching in the first year of the Computer Science degree at Middlesex University. It is developed as an open-source platform and the design and source code are available online (see links at the bottom of this post).
An overview of this first year has recently been given by Tony Clark at http://clarktony.blogspot.co.uk/2013/12/computer-science-approach-to-teaching.html, including the motivations for our choice of Racket as the core programming language.
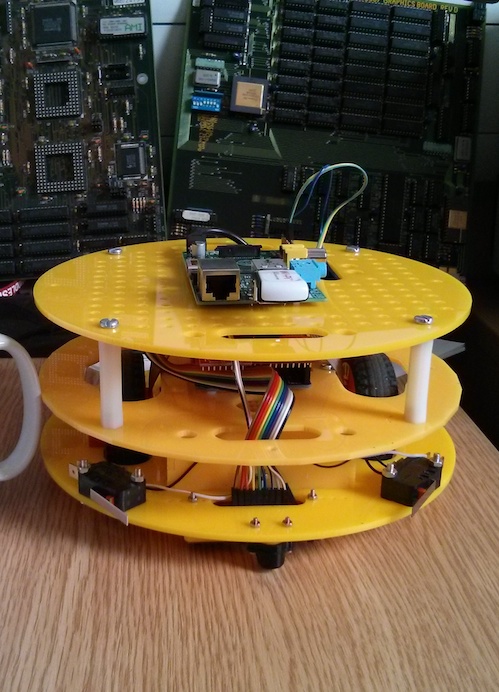
Myrtle is the main character of “block 3″ for first year Computer Science students (see previous link for an introduction to the idea of “blocks” and for an overview of our teaching and assessment strategy). The structure of Myrtle is the following:
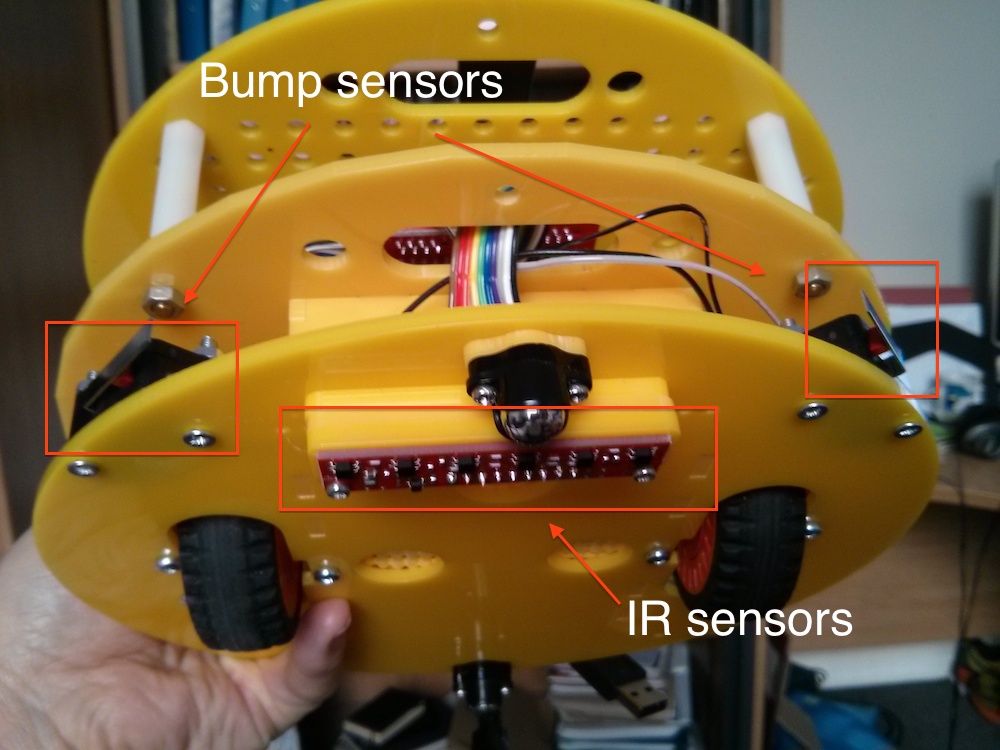
1. A base layer incorporates Infra-Red sensors, bump sensors and a pair of HUB-ee wheels (see figure below):
2. In the center, an Arduino Uno collects the data from the sensors and is connected to the wheels to drive them (see figure below): 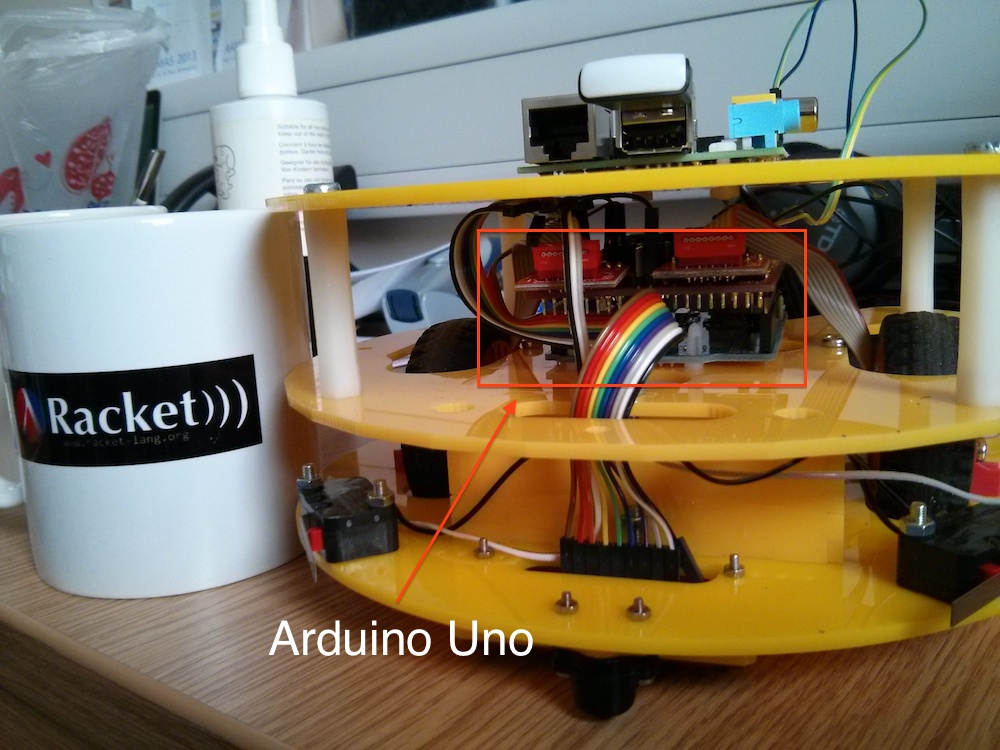
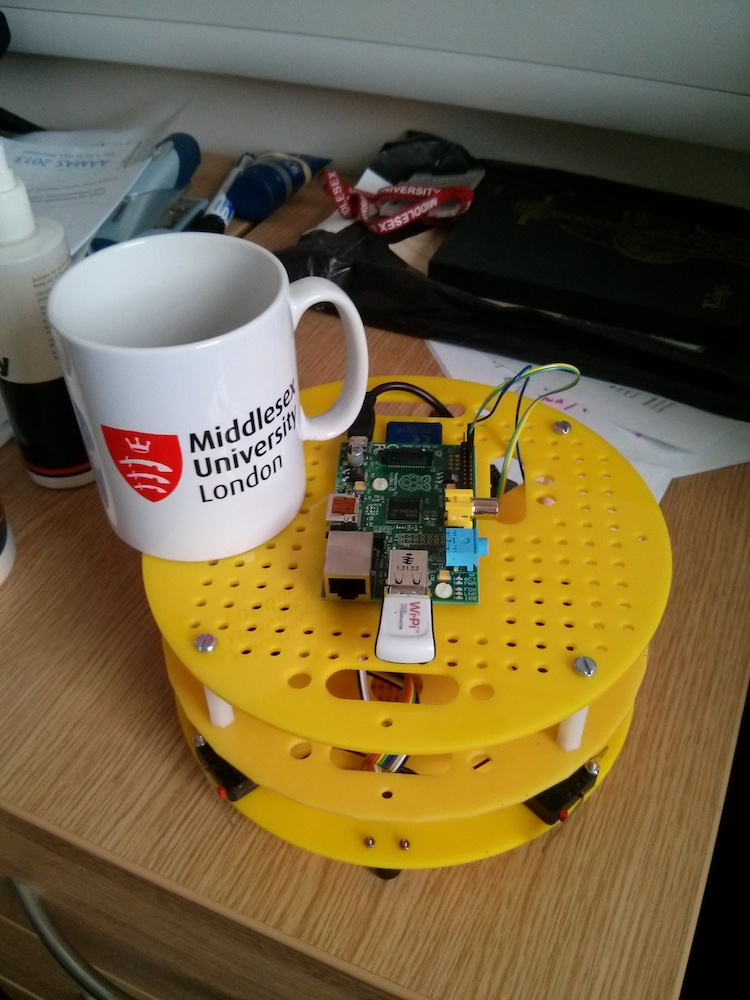
3. The top layer for Computer Science students is a Raspberry Pi that is connected to the Arduino Uno board by means on a serial connection on the GPIO pins (a WiFi USB dongle is also visible in the figure below).
This is a very flexible platform: Engineering students will employ mainly the Arduino layer (possibly two Arduino layers, one on top of the other) together with the Arduino IDE. Computer Science students will work mainly at the Raspberry Pi level, possibly extending the core platform with additional features (USB cameras, a fourth layer on top, etc.). More importantly, the platform offers a number of opportunities for teaching core Computer Science notions: from product of finite state machines to concurrency and synchronisation when reading the encoders, from networking at all levels (IP, TCP, applications) to data structures, functional programming, etc.
The software architecture of the platform for Computer Science students involves:
- A modified version of Firmata running on the Arduino Uno. This is an extension of Standard Firmata developed by Michael Margolis, the author of various books including the “Arduino Cookbook” and currently at Middlesex University.
- A Racket Firmata module extended with SysEx messages and other features used in Myrtle. This version works on Windows, Linux and Mac and detects the operating system automatically, together with the port to which the Arduino is attached.
- A Racket module (MIRTOlib.rkt) to interact with Myrtle using the Firmata library described above.
The following is an overview of block 3 for first year Computer Science students:
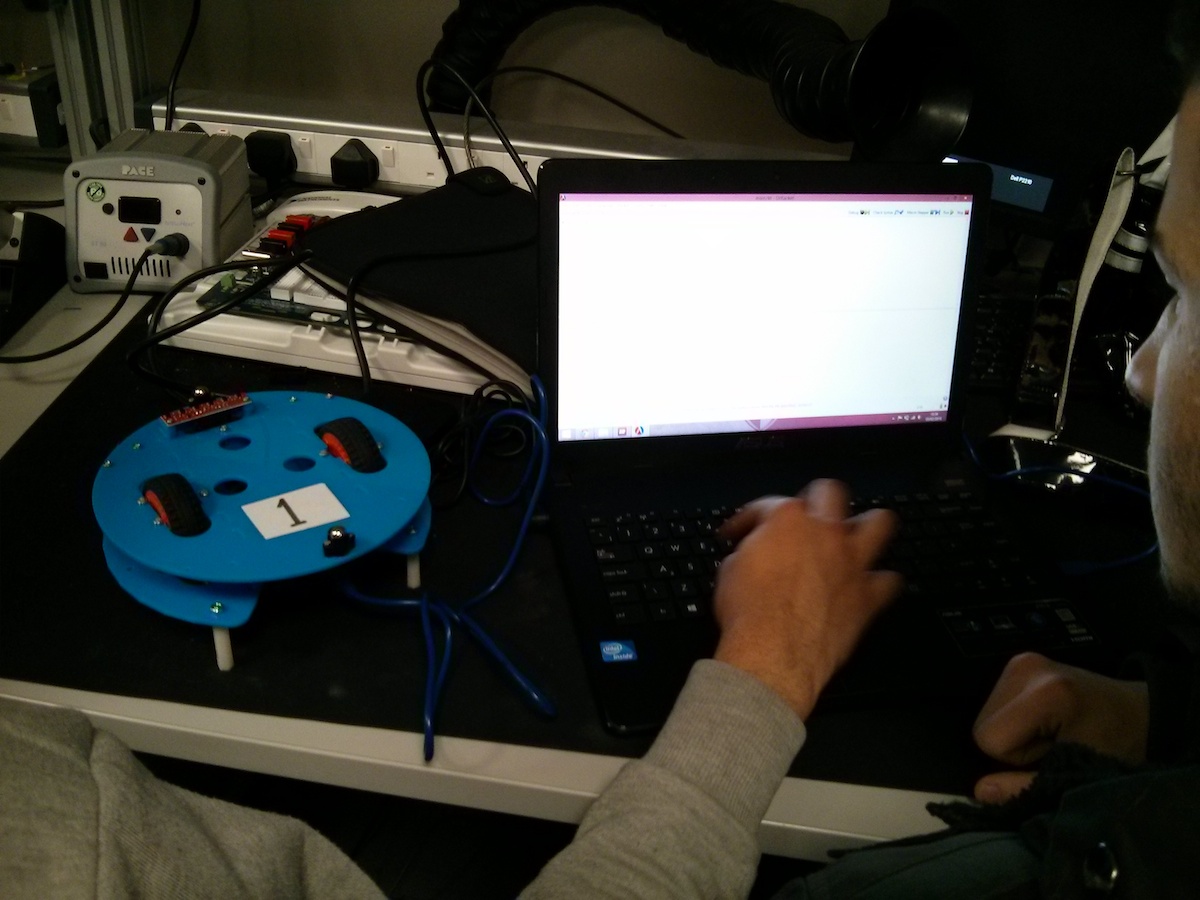
The students are initially exposed to the Arduino layer only to familiarize with MIRTOlib.rkt. In the figure below, Myrtle is provided without the Raspberry Pi layer and is connected directly to a PC or laptop using a USB cable. We employ this configuration to reason about interaction between components (wheels and sensors) using finite state machines, use cases, statecharts and sequence diagrams. We also have a local installation of MediaWiki for students so that they can document their progress using wiki pages they create. In the picture below, DrRacket is running on the PC/laptop and the Arduino layer of Myrtle is connected using a USB cable:
Teaching then moves to networking, introducing IP addressing, TCP and network applications. The main result is an HTTP server built in Racket that can control an Arduino board using Firmata to turn on and off LEDs. The following is an example handout for the students addressing the HTTP server in Racket, starting from unquote + splicing, then moving to xexpr and finally to the actual HTTP server (click on the link to download the PDF):
A simple HTTP server in Racket (PDF)
In parallel, we start introducing some basic functions provided by MIRTOlib.rkt so that the students can move the wheels and read bump and IR sensors.
We then move to introducing a new architecture and a new operating system: Raspberry Pi (ARM) and Linux. At this point we add the third layer to Myrtle and we “detach” the robot from the PC/laptop. We now access the robot over a wireless connection on the Raspberry Pi, where students upload Racket code and run it from the command line.

The material now asks the students to reason about control . For instance, students are asked to print the IR sensors every 2 seconds and to move the wheels for 2 rotations, stopping immediately if one of the bump sensors is activated. In parallel, student learn how to read and post tweets using the Twitter API from Racket and they study encryption algorithms, authentication mechanisms and, in particular, OAuth 1.0 for Twitter.
Finally, students have a go at “control theory” with the problem of line following. This gives us a chance to talk a little bit about calculus (derivation and integration) to build a PID controller for the robot (click on the image for a video about this, available at http://www.youtube.com/watch?v=laafaTZ7mDU).

In the last two weeks the students will split into groups and will work on a project of their choice. Ideas include a web interface to drive the Myrtle wireless, control via majority voting using Twitter, advanced line following in various conditions, dancing robots, etc. I will provide additional details at the end of this block, together with the Racket code for line following and other examples: I don’t want to publish it now because students need to find it on their own!
So far, the results are very encouraging: we are nearly at the end of the course, with only 6 weeks left, and attendance is regularly above 90% (yes, this is 90% for all lab sessions in a cohort of approximately 120 students). Students are engaging with the material and it is common to see students remaining in the labs well after the end of the sessions.
Setting up this block has required a lot of preparation work by a number of people. Apart form all the academics and teaching assistants from the Computer Science department, we had enormous help from Michael Margolis, Puja Varsani and Nick Weldin.
In terms of practical issues:
- So far, the robots seem to cope well with students using them, no major hardware failure reported in nearly 5 weeks of continuous usage. We have approximately 20 robots and we typically use 7 or 8 of them per session (each session is attended by approximately 20 students).
- We have approximately 20 battery banks (9000 mAh), which are enough to go through a day of sessions. The batteries are recharged overnight.
- Every week we provide a set of SD cards for the Raspberry Pi, setting up an environment with Racket and all the additional software required (voice recognition and image capture, for instance)
The source code for this platform is available at:
- https://github.com/fraimondi/myrtle: Arduino code for the Arduino Uno layer (modified Firmata), MIRTOlib.rkt and some simple testing functions. Design files will be added very soon.
- https://bitbucket.org/fraimondi/racket-firmata: platform-independent (in the sense that it seems to work well in Linux, Mac and Win) Firmata client for Racket. We have tested it with “standard” boards and it seems OK, even without Myrtle.
- We also have an SD card image ready that includes Racket 5.3.6 pre-compiled. Send me an email if you want one of these.
Feel free to contact me if you need additional details!
Pingback: » Controlling an Arduino board via USB with the ASIP protocol Franco Raimondi
Pingback: » Choose a random function from a list in Racket Franco Raimondi