I started playing with Repast Simphony both for research and for teaching. This is a first post that includes a quick overview (part I) and some installation instructions (part II). Hopefully I will be able to add more details in the future.
Part I: Quick overview
Repast Simphony 2.0 is an “agent-based modeling and simulation platform”. Using this platform agents can be modelled using ReLogo (a dialect of Logo), flowcharts, Groovy, or Java. Notice that there is also a Repast for High Performance Computing “intended for large-scale distributed computing platforms” using C++. Here I am only looking at Repast Simphony, and only at Java as a modelling language.
The tutorial available at http://repast.sourceforge.net/docs/RepastJavaGettingStarted.pdf provides a step-by-step guide for building a simple application called jzombie. I’m not going to go through this tutorial in detail. Instead, I highlight some of the key features of this framework using the example from the tutorial.
In Repast agents are created as simple Java classes with the use of some Repast-specific methods. For instance, this is an excerpt of the Human class in jzombie:
1 2 3 4 5 6 7 8 9 10 11 12 | public class Human { private Grid<Object> grid; // [...] @Watch(watcheeClassName = "francojrepast.Zombie", watcheeFieldNames = "moved", query = "within_moore 1", whenToTrigger = WatcherTriggerSchedule.IMMEDIATE) public void run() { // [...] } } |
Human agents live in a Grid (a Repast Class), and the simulator invokes the method run() whenever the condition specified in the @Watch annotation becomes true (intuitively: whenever a Zombie is at distance 1). Zombie agents are modelled in a very similar way and they implement a method step() that is invoked at every step in the simulation (see the tutorial for the full code). All the agents are defined in a context, as exemplified by the following code:
1 2 3 4 5 6 7 8 9 10 11 12 13 14 15 16 17 18 19 20 | public class JZombiesBuilder implements ContextBuilder<Object> { @Override public Context build(Context<Object> context) { // [...] int xSize = (Integer)params.getValue("x_size"); int ySize = (Integer)params.getValue("y_size"); int zombieCount = (Integer)params.getValue("zombie_count"); int humanCount = (Integer)params.getValue("human_count"); // [...] for (int i = 0; i < zombieCount; i++) { context.add(new Zombie(space, grid)); } for (int i = 0; i < humanCount; i++) { int energy = RandomHelper.nextIntFromTo(400, 1000); context.add(new Human(space, grid, energy)); } // [...] } } |
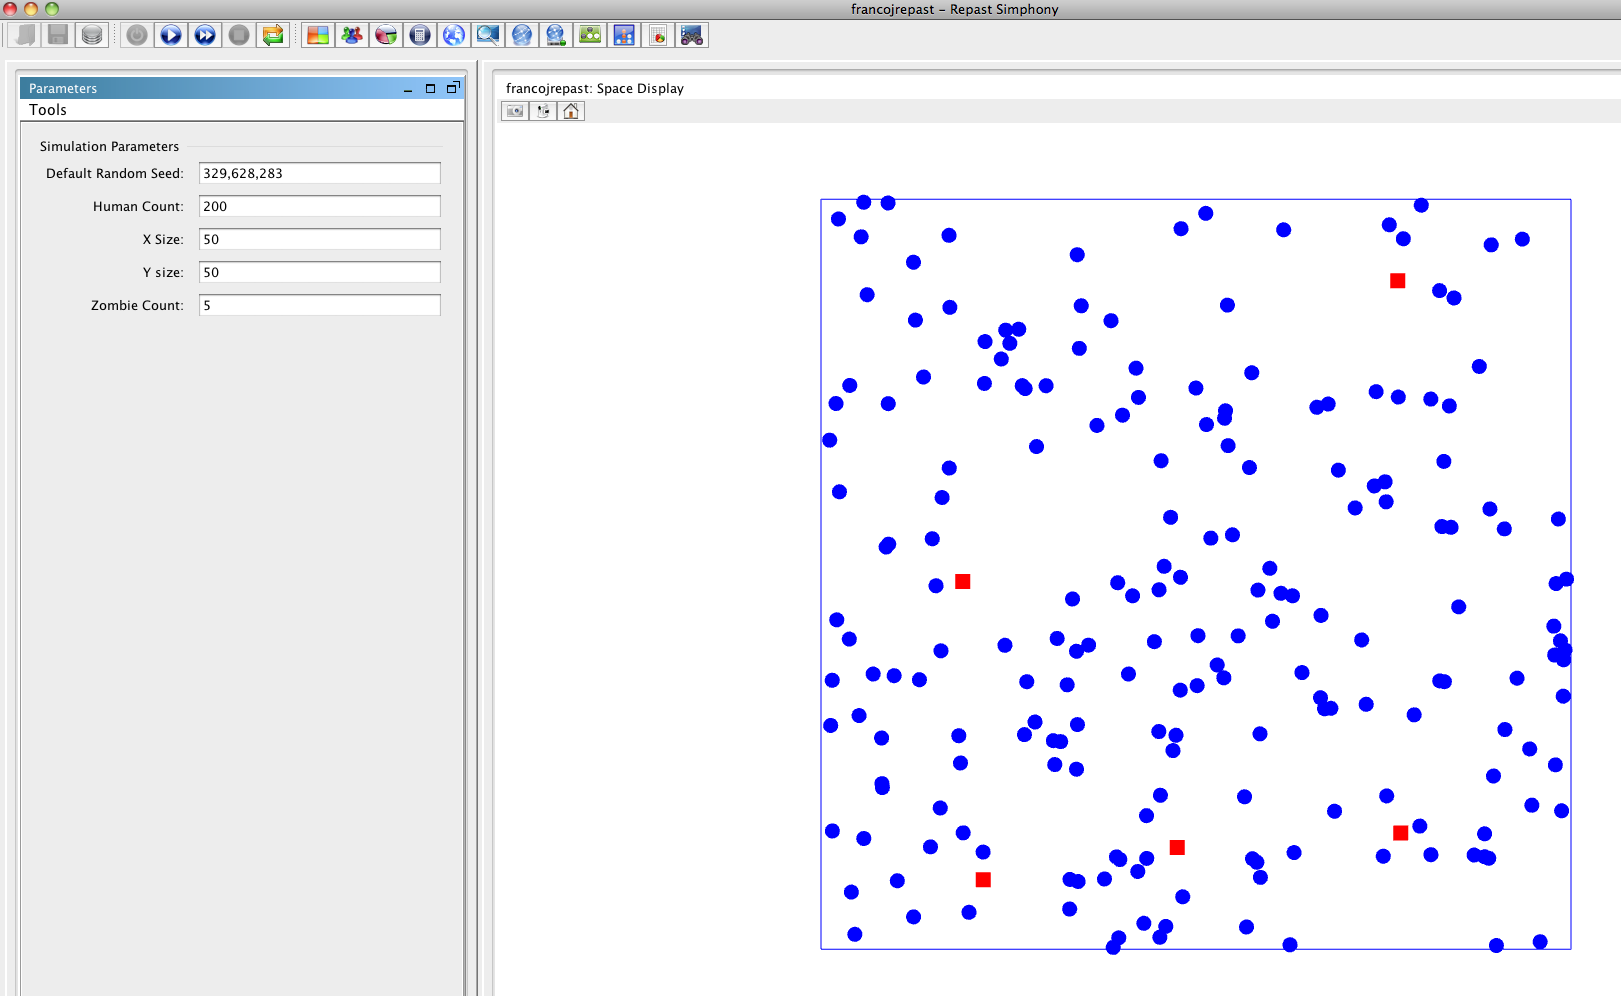
The method build() reads parameters from the simulator (see below) and creates the appropriate number of agents (notice the use of the Repast class RandomHelper to generate random values for energy levels of humans). Agents are added to the context that, in turn, is created by the simulator. The Repast simulator is invoked from Eclipse (see tutorial for the details), and this is what it looks like after it starts:
 Notice that these are the same parameters specified in the context Builder above. The simulator can be configured to display the grid and, by running it, it is possible to follow the evolution of the system. This what the grid looks like at the beginning of the simulation:
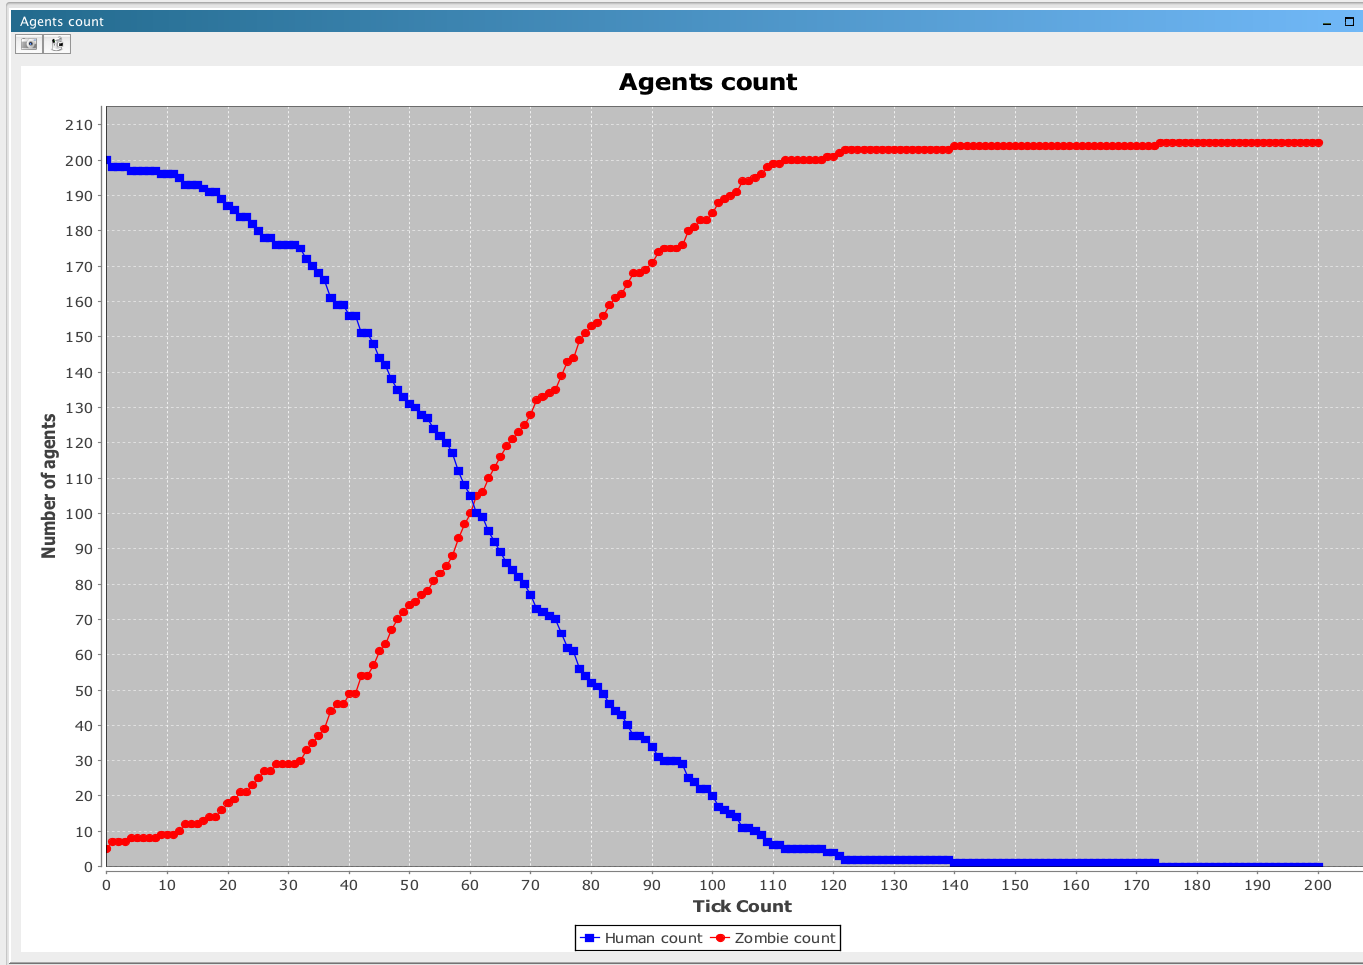
It is possible to add a number of features to the simulator. For instance, it is possible to create data collections (such as counting the number of agents) and to display time series. This is an example of the total number of Humans and total number of Zombies over time:
It is also possible to define connectors with external tools, such as R, Excel, and generate SQL code. This is what I am planning to do next.
Part II: Installation Instructions
First of all you need to download the tool, which essentially runs as an Eclipse plug-in. Depending on your platform, this is what you need to do:
- Mac OS X: just download the 64-bit image or the 32-bit image and follow the very easy instructions. This will download a (large) image containing Eclipse 3.7 and all the necessary plug-ins already installed.
- Windows: download and run the Windows Installer (I have not tried this, but I assume that it is similar to Mac OS X)
- Linux: this is slightly more complicated:
- You need to download Eclipse. I used a fresh copy of Eclipse 3.7 Classic 64 bit (a 32 bit version is also available).
- You then need to install Eclipse XML Editors and Tools: click on Help -> Install New Software, then click in “Work with” and select “All Available Sites”. Scroll down the list, expand “Programming Languages” and select “XML Editors and Tools”. Complete the installation and restart Eclipse as required.
- You then need to install Groovy using a local archive. Download this zip archive and expand it somewhere on your disk. Go back to “Help -> Install New Software”, now click Add, select Local, and browse to the directory you have just created. Select all items and install them. Again, Eclipse will restart.
- At this point you can install Repast Simphony. Once more, click on “Help -> Install New Software”, select Add and in Location copy this link: http://mirror.anl.gov/pub/repastsimphony. Select everything, install and restart Eclipse.
If everything went well, you can now start the platform. If you are using Mac, you will find Repast in your Applications folder. If you are running Linux, just start Eclipse. You can create a new Java Repast project with File -> New -> Other, open Repast Simphony and choose “Repast Simphony Project”. At this point you can go back to the tutorial.